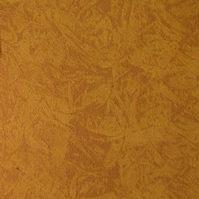
How To Paint a Faux Leather Look on Furniture
Who doesn’t love the look of leather? Leather screams luxury. Leather is timeless, warm, and sophisticated. And there’s no doubt there are some drop-dead gorgeous leather furniture pieces out there, but they aren’t often affordable. That’s where learning how to paint faux leather comes in handy. In just a few hours (and on a minimal budget) you can transform an otherwise run-down piece of furniture into a classy, showcase piece.
What is faux leather painting?
Faux leather painting is a decorative painting technique. A glaze is applied over a basecoat, then while the glaze is wet, it is texturized with a special faux painting tool called a stippling brush. The result is furniture (or even a wall) that has the look and textured appearance of leather. You can create the look of faux leather in nearly any color. Traditionally, of course, we usually see leather in tan, light and dark rich brown and even deep mahogany red. Let’s learn how to faux leather paint.
Furniture ideas for faux leather painting.
Use your imagination; almost any piece of wooden furniture can be faux leather finished. But you’ll often find faux leather paint technique used on furniture in home offices, libraries, dens, media rooms, dining rooms and powder rooms. We’ll discuss how to faux leather paint furniture, but remember, you can easily transfer this decorative painting method to the walls or ceiling of a room for extra drama.
How to faux leather paint furniture.
- Prepare furniture. Using blue painters tape, tape off any areas you don’t want to faux leather paint. Remove hardware that may be on the piece of furniture. If the furniture has drawers or doors, remove them and faux leather finish them separately. Be sure the furniture is free of dirt, dust and debris. Apply a basecoat of semi-gloss latex paint (if the piece isn’t already finished this way.) Keep in mind that to produce the most genuine leather look, you’ll want the basecoat color to work well with the glaze color- so more than likely, you’ll need to paint the furniture with a basecoat. Let dry completely. Tip: Apply a second coat if necessary, your project will benefit from a solid basecoat.
- Paint on glaze. Pour glaze into a disposable painter bucket or paint try. Liberally apply glaze to a bristle brush, or if your piece of furniture is large, you can use a small roller. Tip: Work in small sections at a time, so that the glaze does not dry before you work through it with the stippling brush.
- Mottle the glaze. Start working the glaze with the faux leather stippling tool by holding the tool and nearly a 90 degree angle from the wall. Use a quick motion, changing the angle of your wrist every time the tool strikes the wall. The action should be somewhat of a pouncing movement. While you should work quickly, don’t work sloppily. You’ll want the piece to have a uniform, professional look. Tip: Clean the stippling tool with a clean, lint free rag as often as necessary to remove excess glaze. Glaze will clump up the bristles of the stippling tool, and thus ruin the faux leather effect.
- Finishing small spaces. Use a corner stippling tool to mottle tight spaces on your furniture. Remove blue painters tape while the glaze is still slightly wet. Let piece dry at least 24 hours.
Tools and materials needed to faux leather paint furniture.
- Drop cloth or other material to protect your work space
- Tools to remove hardware from furniture
- Blue painters tape
- Latex basecoat in semi-gloss finish (light colors like off-white or cream work best)
- Faux technique glaze (faux leather color of your choice)
- Paint roller and paint brush for basecoat
- Paint tray
- Paint bucket
- Clean, lint-free rags
- Leather faux finish stippling brush
- Leather faux finish corner stippling tool
Tips for creating faux leather finish on furniture.
The faux leather decorative painting technique is not a difficult one. In fact, it’s a great faux technique for do-it-yourselfers. That said here are a few tips to make your first faux leather painting experience successful.
- Work quickly, but consistently. The glaze dries relatively fast, but you still have time to re-work areas you’re not happy with. Consider asking a friend for help. Using a partner can really come in handy. One person should glaze while the other mottles.
- Work in small sections. If you have a large piece of furniture, you might be tempted to glaze the entire project at once. Beware! Working in small, 3 foot sections will yield best results. Take your time and do it right.
- Use irregular forms. When painting on the glaze, vary the shape and size of the glazed section- this creates the most genuine leather look. Do your best not to overlap the glaze sections, or excess glaze will build up and create an unnatural look.
- Stop and observe. Every once in a while, take a step back and look at the mottled glaze. You may have inadvertently created a pattern, or you might see an area with much heavier glaze than another. Look at your faux leather painting project while the glaze is still workable, and you’ll easily fit any imperfections.
Practice your faux leather painting technique on a piece of foam board or piece of scrap wood before undertaking a piece of furniture. Keep the tips I’ve mentioned in mind, and enjoy the creative experience of faux leather painting!


