
Rag rolling has been a popular technique for ages, but until fairly recently, achieving this unique texture has been a messy undertaking. These days, rag paint rollers keep your hands free of paint and glaze, and allow you to produce good results very quickly.
The only drawback to using a specialized roller is reaching into corners. You’ll still need to keep a few rags on hand for finishing touches in these tricky spots. This article on ragging on by hand will help you perfect your technique.
What Is A Rag Roller?

Rag roller covers are specifically designed to mimic the rag rolling technique. These covers are designed to fit on a standard 9″ paint roller.
The heavily textured surface varies by brand. In some cases, the cover is pleated or gathered fairly uniformly. In others, the fabric is randomly bunched on the cover. The material the roller is made of can vary, too. Leather and lint-free cotton are two commonly available types. Choose your rag roller by the effect you want.
Home-made Rag Roller

You can make your own rag roller by using a good quality nap roller with a plastic core. Try stapling squares or rectangles of chamois, felt, or cotton onto the roller. Position the staple in the center of each piece, leaving the edges free. Vary the position of each rag to create a more random texture. Space the rags close enough to each other that the staples aren’t exposed. They can leave marks on the wall.
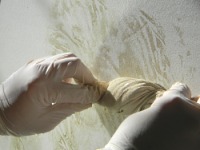
An alternative is the rap the roller cover with a rag, making pleats as you wrap. Fix the rag to the roller using rubber bands at both ends. You can also staple the ends.
Choosing Colors for Rag Rolling

With a rag roller, you will use the ragging on technique. This makes either subtle or dramatic results possible. It all depends on the colors you choose and how you apply the color.
For the most understated look, use hues in the same color family—two shades of blue for example. You can even use the same color. Just layer a glossy version of the paint over a flat base coat. Another option is to layer white, cream, or beige over a deeper shade. Try hunter green, mauve, or charcoal gray as the base coat.
Higher contrast provides a more striking effect. Try a yellow base coat and rag on red or green. Or, use a pale, cream colored base, then roll a deep, dark shade over the top. Try navy or chocolate brown.
Choosing Paints for Rag Rolling
While washes and glazes are the traditional choices in paint for rag rolling try experimenting with different types of paint. Metallics, textured paints, or pearlescent finishes can create interesting results.
Tips and Tricks
- It’s important to make sure that your top coat is compatible with the layers underneath. It’s not safe to apply a latex (water based) paint over an alkyd (oil based) one, but the other way around.
- You should be absolutely sure that your base coat is dry before rolling on another shade of paint or glaze. If it’s wet, the colors will smear together instead of staying distinct and creating attractive textures.
- Use two paint trays, one with the glaze or top finish in it, and a second just for rolling off the excess paint. Dip the roller in the paint and remove as much excess as you can in the first paint tray. Then give the roller a roll or two to blot it off in the second tray. This way you won’t end up with excess paint or glaze on the wall.
2 Responses
How do you prepare a wall to go back to a regular painted wall, once it has been painted using the rag on technique.
It’s not much different from regular painting.