Few tools are easier to use than a caulking gun. It only takes a little bit of practice to figure out how hard to depress the trigger and how fast to move the gun for an even bead; after that, you’ll feel like a pro! Keep in mind that a well-designed gun will be easier to use than a cheap, poorly made one; read more about choosing a caulking gun.
Opening the Tube
Many of the high quality guns available have a built-on cutter for opening the tube. If not, use a razor knife to cut off the end off the plastic nozzle. Try to create an opening about 1/8″ wide, and make the cut at a 45 degree angle. Many tubes have a cutting guide on the nozzle. If you’ll be caulking lots of large gaps, consider making the opening a bit wider. The caulking may also be protected by a foil seal, especially if the caulk is packaged in a cardboard tube (plastic tubes usually don’t have foil seal). Again, many guns will have a built-in tool for penetrating this; if not, use a wire or a thin nail to puncture it in several places.
Loading the Caulk Gun
If you’re using a battery operated gun, make sure the batteries are fresh. Either charge them as recommended by the manufacturer or replace them with new ones.
Twist the plunger so the metal notches face upwards and pull the plunger back as far as it will go. Place the tube in the gun; it should be completely flat, seated at both ends with the nozzle protruding from the opening at the front of the gun. Twist the plunger back around so the notches face the bottom of the gun. If you have a basic or battery operated gun, you’re ready to begin caulking.
Pneumatic guns need to be attached to an air compressor. Refer to your owner’s manual to determine what pressure the manufacturer recommends.
Applying the Sealant
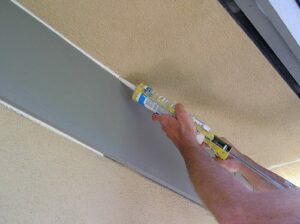
 Hold the nozzle to the gap and, working towards yourself for the best control, squeeze the trigger as you move the nozzle along the gap. Work from top to bottom on vertical cracks; on horizontal ones, do whatever feels best (it will probably depend on whether you’re right or left handed).
The more pressure you apply to the trigger, the more sealant will be dispensed. Try to create the thinnest bead possible that still fills the gap. Move the gun smoothly to disperse the sealant evenly. Try not to stop depressing the trigger in the middle of a gap. You’ll get better results if you fill the whole void in one smooth motion. If you must start and stop, don’t overlap the previously caulked area, or you’ll create a blob. Just start where you left off.
If you’re using a basic caulk gun, the plunger will still exert some force on the tube even after you release the trigger. This can result in blobs and leaking, so be prepared! Dripless and power guns will release more quickly and help you avoid this problem.
Special Conditions: Very Wide Gaps
Elastomeric caulk can handle gaps up to 1/2 inch wide and 1/2 inch deep. Deep or wide gaps (greater than 1/2″) require the use of foam backer rod. This foam rope comes in a variety of widths. Cut a piece of backer rod to fit the crack, then push it into the opening. Apply caulk as usual.
Because caulk always shrinks some as it dries, very wide cracks will require two applications. Fill the crack completely, then allow it to dry overnight. The following day, go over the area again.
If you need to fill an opening greater than 1/2″ wide, consider using polyurethane caulk. It can cover even the worst cracks with a single application. This type of caulk is exceptionally viscous, however. It may prove too difficult to apply with a basic or low-end, battery operated gun.
Smoothing the Seal
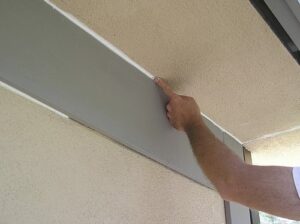
 Before the caulk dries, you’ll need to push the sealant into the joint and smooth the caulk’s surface. Caulk finishing tools are one option if you don’t want to make a mess, or if you have sensitive skin. Otherwise, just use your fingertip!
Allow the caulk ample time to dry, then do a final walk-around. Check all the areas you sealed to make sure that shrinkage hasn’t caused the caulk to pull away from the gap. If it has, go over the area again.
About the Author:
Crowder Painting; Transform your home with our expert house painting services in Colorado Springs. Quality craftsmanship and vibrant colors to enhance your property’s appeal.

