The most lasting and cost effective way to change the color of stucco is with paint. With your full attention on the details, from surface preparation to applying a high quality finish paint, the new look and color of your exterior stucco can be virtually maintenance free for many years.
Quality and craftsmanship is always in the details. This starts with proper surface preparation and any needed repairs. Then continues with choosing and applying the best primer and paint.
Preparation
All masonry surfaces need to be fully cured before any painting can take place. New exterior stucco should be allowed to cure for a minimum of 60 days.
Before any preparation can begin take a good look at the entire surface. Pay attention to peeling paint, rust stains, efflorescence deposits and any areas needing repair. Peeling paint along with stains and efflorescence deposits can indicate water damage. These areas will require closer inspection after pressure washing.
Efflorescence deposits are a power that forms from water migrating through the stucco. This water picks up alkaline salts and deposits them on the surface or behind the paint film. A scrub brush and masonry cleaner might be needed for heavy deposits.
Pressure Washing Stucco
The preparation begins with a thorough washing to remove all dirt and dust. Pressure washing can be a delicate operation. Stucco is a relatively soft masonry coating and can be easily damaged by high-pressure water. Use minimal pressure, 1200-1500 psi and a wide spray tip.
Masonry cleaners and soaps can be used for heavily soiled areas, efflorescence deposits or rust stains. Usually the use of cleaners is not necessary.
Begin washing at the top of the wall and work your way down. Keep the spray tip 12-inches or more away from the surface. Pay special attention to windows and doors. Angle the pressurized water away from these areas to prevent leaks or water intrusion behind the stucco.
The pressure washer can remove loose paint, but it can also remove some of the stucco if the pressure is too high or the tip is to close. Use the washer to provide a clean surface. Don’t rely on it to remove all the loose paint.
Allow the stucco to thoroughly dry before proceeding with priming and caulking. This can take 24 hours or more depending on temperatures and humidity.
Caulk and Sealants
Applying sealants to all cracks and gaps is very important and will drastically affect how long the paint job lasts. Water must be stopped from penetrating beneath the paint finish. The best and most appropriate sealant is an elastomeric caulk. With excellent adhesion and elongation characteristics this sealant will last a long time. Apply all caulk after the stucco is properly primed for the best performance.
Seal around all openings and penetrations. This includes windows, doors and wood trim. Other areas are dryer vents, any plumbing penetrations and at the wall to the soffit.
Stucco Repairs
The most common repairs are large cracks, damaged corners and small areas of missing stucco.
- Cracks – Non-structural cracks will always occur on masonry surfaces. They can either have a random distribution or occur in large numbers. These cracks can range from hairline to 1/4 inch wide. Caulk can be effective on small tight cracks, but will fail when applied to large cracks with a lot of movement. A better alternative is to use a brush grade elastomeric sealant. This thick sealant is available with or without texture to help it blend into the surrounding surface. Apply two coats; allow each coat to dry completely.
- Damaged Areas – Any loose stucco must be removed and repaired. A professional contractor who can match the existing texture should repair large areas. Smaller areas can be repaired with specialized patching compounds. The basic steps are very easy. First chip away all loose material. Now rinse the area with water using a wire brush to remove any remaining powder or grit. The patching compound can be applied after the area has dried.The best patching compounds are a powder mixed with water. The first application will smooth the area and level it with the existing finish. The second application is to provide the necessary texture matching the surrounding stucco. Matching any texture is extremely difficult. Most likely the patched area will a little different.
Choosing Primer and Paint
Primer
An acrylic masonry primer is the best for whole house priming. For spot priming an exterior all-purpose acrylic primer can be used.
Paint
There are several considerations when choosing masonry paint.
- Ability to breath allowing internal moisture to escape and still be resistant to external sources of water.
- Flexible – Move with the house without splitting at any temperature.
- Bridge small cracks. Removing these unattractive non-structural cracks.
- Resist dirt pick-up and mildew growth.
- Be resistant to chipping, chalking and peeling for maximum longevity.
Any high quality exterior finish paint can be used but the best is an Elastomeric paint. Most top quality Elastomeric coatings do not require the use of a primer on clean and sound masonry surfaces. Choosing a finish paint designed for masonry surfaces will ensure maximum durability.
Applying Primer and Paint
Whether spraying or rolling splatters or drips are probable. Complete masking and covering is recommended.
Brush and Roll
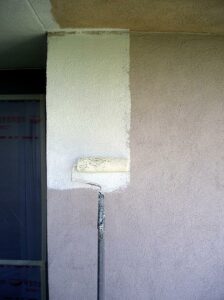
This is an excellent painting method for short or small areas. The choice of roller cover and nap thickness will have a big impact when rolling stucco.
A lamb’s wool roller cover will work the best. These cover are less likely to splatter and will hold their shape. The nap thickness depends on the texture of the surface. Use a 1 or 1-1/4 inch for smooth textures and 1-1/2 inch for ruff textures.
Roller applications should be two coats, even if the new color covers well. Two coats will fully fill the pores and provide the proper film thickness.
Begin with the cut-in. Brush around all doors, windows and other openings. This includes any trim and the wall to the soffits. Allow a brushed border of paint 4-6 inches. This will allow the roller to overlap 2-3 inches creating a better seal.
While rolling always saturate the roller cover and never dry roll. Apply a heavy even coat starting at the top of the wall. Finish rolling in a downward direction to make sure the stipple is in one direction.
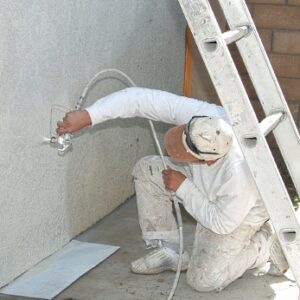
Spraying
The size of the airless paint sprayer and tip depends of the type of finish paint.
- Normal exterior acrylic paint can be sprayed with a 1/2 gallon per minute airless sprayer and a tip size of .015 or .017. The fan width is optional.
- Elastomeric paints need a larger pump and tip in order to achieve the proper film thickness. A minimum pump size is 1-1/2 gallons per minute and tip size of .021. This depends on the manufacture and their recommendations.
No matter which type of paint is used at least the first coat should be back rolled to properly fill the pinholes and tight cracks. This method will require two people, one spraying and one rolling. The same  considerations when brushing and rolling need to be followed.
Apply the paint as a thick continuous film, immediately roll behind the sprayer. On a hot day you will have to move quickly. To make this a more enjoyable experience, work in the shade as much as possible and follow behind the sun.
Begin spraying at the top and work your way down, working the wall in sections. In order to cover the surface efficiently spray using a horizontal, side to side, movement and back roll using a vertical, up and down, movement.
The objective when painting stucco is to provide a continuous film of paint and a pinhole free surface. Do not skimp on the quality of primer or paint and the amount used. Use the best method specific to you and your own situation.
About the Author:
Crowder Painting offers complete interior and exterior painting services in Colorado Springs with an eye on the details. We have all the tools, experience and knowledge to do the job right. Receive a paint job that lasts; Give us a call, all estimates are free.


2 Responses
Hi: I preparing my stucco home for painting and am almost finished with power washing and this appears to have removed all of the places where a fine coating of dust would show up on my hand when I rub it across the surface of the exterior wall. Some folks are telling me I need to put a coating on the walls if the hand method produced a coating. I am thinking that if the power washing is eliminating the dust, I should be able to just paint? Second I have found a couple of hairline cracks in the surface of the stucco. Not many but some and I believe the paint will easily fill these cracks. Is this an ok way to proceed? Again some are suggesting patching but there is not any cracks wide enough to fill. Third: I am going to roll the paint as I have time and just not comfortable using a spay painter. What type of roller is best for my fairly rough stucco 15 year old Florida home?
Thank You
Once the dust is removed you can go ahead and paint. At this point it is a good idea to apply an acrylic masonry primer to further stabilize the surface. This type of primer is fairly inexpensive.
Hairline cracks that can be filled with the paint are fine as is. Larger cracks need filling with either caulking or a brushable sealer, most paint stores have a synthetic stucco color coat or thick sealer that can be used for this purpose.
Best roller will be 1 – 1 1/2 inches thick. Choose an inexpensive roller cover and buy several, the cover will collect loose particles off the surface and become compacted (best to just use another when this happens).
Note; The best “paint” for stucco is elastomeric. It is thick (can seal many cracks) and self priming on stucco. By far the best choice.