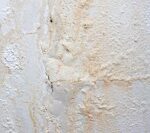
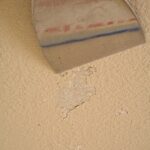
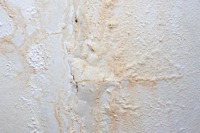
It is best to prevent problems in the first place, as there is not much point in starting an interior paint job without first pinpointing the cause of previous peeling issues. Repainting alone may fix the problem, but in some cases the problem will occur again.
Here are some pointers on narrowing down the causes of peeling paint. Take care of the cause, and your new paint job won’t peel.
Moisture
 Look for any water sources that could be undermining the paint. Proper maintenance of the exterior paint goes a long way, because damaging water often originates from outside. Fix and repaint any cracked or missing caulk around windows.
Windows sweat in winter, especially single panes. Water running down the glass penetrates into the wood. Even the best paint and primer will not prevent peeling in this case. The best thing to do is stop the water by caulking the frame to the glass with paintable clear caulk.
Try keeping home humidity levels under 50 per/cent, especially in bathrooms. Too much humidity will condense back into water inside the walls. Bathrooms always have excessive humidity from water vapors created by baths and showers. The vapors seep into floorboards and ceilings.
A properly sized bathroom exhaust fan can prevent many interior paint problems, not to mention mould and slowly occurring structural damage.
Another moisture source is cracked foundations. Fixes to this range from simply repositioning downspouts to changing landscaping to improve water flow away from the house. If peeling remains a problem after water flow is re-directed, then try a concrete primer.
Roof leaks will cause water stains before causing serious damage. Metal air conditioning ducts will condensate water when home humidity is too high.
Inadequate Preparation
 Preparation is the foundation of a beautifully painted room. Paint-prep is so important that it is the most vital consideration for a lasting and professional-looking paint job. Proper preparation can take considerably longer than the actual painting.
Before tackling the surface, clear the room as much as possible. Removing items is a time-saver in the long run. Paint sometimes does get spilled and you don’t want to be tripping over furniture or smaller items. Don’t forget to remove wall hangings and electrical covers.
Certain things in rooms cannot be removed, so they must be masked. Trim, windows and doors for example. A poor masking job looks bad and can contribute to peeling. Don’t be fooled by the name ‘masking tape’ and think the regular kind will do. Green or blue painters’ tape is required because of its higher quality and enhanced water resistance. The adhesive on regular masking tape is too strong, making it difficult to remove after a few hours. It can affect the paint’s bonding and promote early peeling. Proper painters’ tape is less adhesive and has ‘safe release’ properties. The packaging will state the maximum time it can stay in place, but it is best to remove painters’ tape as soon as possible.
Surface Preparation
All surfaces, even new ones, must be properly prepared before painting. This includes scraping away all loose and flaking paint. After scraping, sand the remaining paint edges to create smooth transitions.
Painting over a dirty or greasy surface is a no-no. The paint will peel unless the interior surfaces are all clean. Dirt and grease will prevent the new paint from bonding. Heavy duty cleaners such as those containing trisodium phosphate are recommended. Rinse well after cleaning, and allow to dry completely before applying paint.
Glossy finishes need to be dulled before painting, so sand with 120 or 150 grit sandpaper. Using a liquid deglosser like Paso in addition to sanding will ensure maximum adhesion.
Use a good primer with sealing capability. Time causes old paint to get brittle and crack, which leads to flaking and peeling. A good quality primer will promote the best adhesion and prevent cracking and peeling.
If drywall being painted needs repairs or evening out, first apply a patching compound followed by a stain-blocking primer to the repaired area.

