Preparation is key to achieving the perfect final results you want when you are refinishing your kitchen cabinets. Follow the steps for preparing your cabinets for refinishing, and it make everything easier.
- To start any type of cabinet refinishing project, remove the cabinet doors, hinges and knobs.
- Remove all the drawer fronts. Usually they are held in place by a few screws which can be reached from inside the drawer. If the drawer fronts are permanent, then remove the entire drawer. This makes things a bit more difficult because you have to empty the drawers, but trying to refinish drawers in place is not a good idea if you want professional results. For tips on how to remove cabinet doors and drawers so putting things back where they belong is easier read Refinishing Your Kitchen Cabinets – How to Disassemble Doors and Drawers for Great Results.
- While you can’t avoid refinishing cabinet faces in place in most cases (taking down cabinets is time consuming and only works if they were screwed into place), you’ll want to lay any doors flat. Drawer faces need to be laid flat as well.
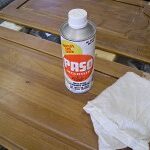
 When refinishing kitchen cabinets, cleanliness is the golden rule. This is probably one the most important steps. Trisodium phosphate, more commonly known as TSP, works great at removing grease or grime and produces truly clean surfaces. This is what the pros use. TSP is inexpensive and available at any hardware store.
- Clean all cabinet pieces thoroughly and allow enough time for complete drying before proceeding.
- If you are painting your kitchen cabinets, you may want to fill any holes in the surface with spackling compound. If there are dents or gouges, epoxy putty can fill in missing areas. Do your best to fill the damaged area evenly, as you’ll have to sand it smooth before you paint. The neater your work is at this stage, the less time you’ll spend sanding.
- Sanding is often the next step. Sanding may not be necessary for the cabinet refinishing option you choose. It depends on the condition of the cabinets and what repairs you may have had to make. If in doubt, use a fine grit sandpaper and lightly rub down all the surfaces. You want to be sure the final finish whether it is paint or varnish is able to adhere.
- Vacuuming and wiping down with a tack cloth follows sanding. You don’t want any fine dust particles ruining your finish. A vacuum cleaner is very effective because it gets dust out of corners more effectively than a cloth.
Ultimately remember that paint doesn’t hide bumps or nail holes. If you aren’t aiming for a distressed look, you’ll want to take time with bringing your cabinet doors and cabinet faces into shape. Careful preparation can make old cabinet doors and drawers look like new.

