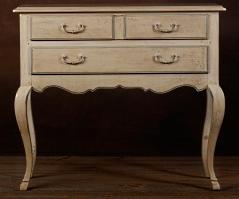
Glazing Furniture – Common paint glazing techniques to try for a one of a kind look.
Glazing furniture is used in antiquing furniture to change the surface of the piece. Glazing is most often used to make the piece appear older, texturized, wood grained, or to simply change the color of the piece. Glazing techniques vary, but essentially, glazing involves painting a basecoat, then painting over the basecoat with the glaze and finally rubbing, combing or otherwise manipulating the glaze while it is still wet. Glaze can be purchased already tinted, or un-tinted, but ready to tint with the color of your choice. Let’s talk about some often used glazing techniques.
Common glazing techniques.
- Dry-brush Technique. The dry-brush glazing technique is a rather simple one. Apply glaze to the prepared furniture surface. While the glaze is wet, drag a dry bristle brush across it. Dry-brushing offers a linen or texturized effect. You can drag the dry brush both vertically and horizontally to create a woven look (let the first coat of glaze dry completely, and then repeat the process in the other direction.) Wipe the brush often so it does not become saturated with glaze.
- Wet-Brush Technique. This technique is very simple. Quickly and thickly apply the glaze with a brush, making sure to get the glaze into all crevices. Before the glaze has a chance to dry use a damp rag to remove the excess. The removal can be done by wiping or dabbing. Rinse the rag out often in clean water.
- Combing. Combing is a glazing technique that’s often overlooked. But it’s fun and easy, and produces fantastic results. You’ll notice that it is similar in application to the dry-brush effect. Apply glaze to the prepared furniture surface. While the glaze is wet, drag a faux finish comb through it. Vary wide and narrow faux finishing combs for a dramatic effect.
- Sponging. Sponging has come a long way in the last decade. Sponging typically involves a positive and negative application; meaning glaze is applied to the furniture with a sponge, and then removed with a sponge. Prepare the furniture surface, then mix 1 part glaze to 4 parts latex paint. Pour mixture into a small painters bucket. Dab the sponge into the mixture, then pat excess paint onto a paper plate. Tap the sponge on the furniture in a random pattern. Then, use a clean sponge (without glaze on it) to dab over the glaze mixture while it is still wet-thus removing some of the glaze.
- Rag rolling. Rag rolling is a technique that takes a bit of getting used to; but the results are gorgeous. Prepare the furniture surface. Wet a clean, white rag with water, and then ring it out thoroughly. Submerge the cloth into the glaze, and wring it out. Roll rag into a piece that’s easy to work with, and then roll the rag over the surface of the furniture. Or, apply glaze to your piece or furniture and then roll a clean rag over the glaze to remove (or subtract) the glaze from the piece.
Glazing furniture can bring new life to almost any overly-loved piece of furniture. It’s a versatile, creative faux painting method that’s easy to learn. Follow these glazing tips for knock-out results:
- Glaze in a work space that is well ventilated. Consider wearing eye protection and even gloves- faux glazing can be a messy project!
- Remove hardware, doors and drawers from piece before you get started faux glazing.
- Apply a latex basecoat to the piece of furniture you’re glazing. If the piece you’re glazing has a polyurethane finish, you’ll need to strip it.
- Practice, practice, practice. Use a scrap piece of wood or foam board to practice the glazing technique before you tackle the real deal.
- Start glazing in an area that’s not very noticeable. Although you’ve practiced, you’ll still get better at glazing furniture as you progress, so start working an area that’s not obvious.
- When possible, work with the wood grain for best results.
- Consider color choices. Think through your basecoat and glaze color choice to be sure that they will work well together, and capture just the look you’re going for. Color is an important part of creating the mood for the piece. Usually, a satin latex paint works best for the basecoat. Let the basecoat dry at least 3 hours before applying glaze.
- If mixing glaze with paint, mix a bit more than you think you’ll need. It’s tricky to get just the same combination more than once!
Here’s a list of supplies you’ll need to faux glaze your furniture.
- Drop cloth or other protective material for work area
- Tools to remove hardware from furniture
- Foam brush to apply basecoat
- Small painters bucket to mix glaze (if tinting glaze yourself)
- Mixing stick
- Paint tray
- Latex paint for basecoat
- Tinted or tintable faux glaze
- Clean rags
- Paper plate
- Gloves
- Tool for creating glazing finish (sea sponges, comb, rags, etc.)
Next time you discover that yard-sale dresser that needs a little TLC, why not consider giving it new life with a faux glazing technique? I’ve described some of the fundamental glazing techniques, and offered a basic supply list to get you started- but I encourage you to investigate each glazing technique further and decide what works best with your décor. From country to classy and every style in-between, there’s a glazing technique that can achieve the look you’re searching for.

