Creating an Aged Look with Faux Patina on Painted Furniture
A distressed faux patina can be created on painted furniture that mimics the wear all furniture goes through over time. Transforming a piece of furniture by giving it an antique patina is actually really a lot of fun and easy to do.
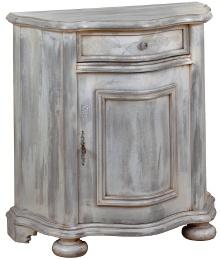
Often, people think of patina as it relates to copper or bronze. But old furniture also has its own patina from daily wear and tare. You may have a nice well built piece that you’re anxious to have acquire the look of aged patina. Or maybe it’s a special table. Old or new, here’s how you can make antique patina happen in just hours!
Recently I discovered a wonderful side table, with nice lines and every attribute I was looking for, except for that special beauty that age brings: patina. A few hours later, I was very satisfied with the new aged patina look of my small table.
How to create a distressed faux patina.
There’s many different ways to create an aged looking patina on painted furniture. Here I will describe how to create a faux patina using primer, glaze and a clear top coat to protect your work.
- Prepare piece: Remove any hardware from piece. Disassemble anything that is easily removed; this includes doors, removing glass, etc. Hardware can be cleaned and a metallic patina applied later for a more unique look. Clean all surfaces with a mild mix of TSP (trisodium phosphate) and water. This will remove any gunk and waxes that have built up over time. Make sure to rinse well with fresh water. Let dry before continuing.
- Sanding or Stripping: Normally stripping isn’t needed. If the original finish, clear coat or paint, is peeling stripping should be done to get to a solid surface. When sanding use 100-120 grit sandpaper to roughen all surfaces. Don’t worry about trying to remove defects; these are desirable to make a convincing aged appearance. Remove all dust with a vacuum and tack cloth. Tip: If your piece is unfinished you will skip this step.
- Primer. Apply a primer, let dry completely, and gently sand. An oil based primer, like Kilz works the best. You might need to apply two thin coats for good coverage without runs or drips.
- Apply base coat. Apply a base coat of paint using a roller, brush or spray, and allow it to completely dry. A satin sheened oil base paint works the best but normal water based paints also work fine. A light colored paint works the best but any color can be used. Either a straight white or off white will produce good results. Tip: Use a brush for application if piece is small, or for hard to reach areas of a larger piece.
- Distress: If you want dents, dings or gouges now is the best time. There are many ways to do this; use a hammer, chain, knife, etc. Edges can be sanded down to expose the original finish for an authentic look. Try to produce areas of random wear without over doing it. This is optional.
- Apply Glaze: Use an oil base glaze for going over oil base paint and water based glaze when going over water based paint. A glaze tinted a very dark brown or gray will work the best. Pour a small amount of tinted glaze onto a plastic plate or wide container. Using a clean, slightly damp brush, dip into glaze and remove the excess. Work with a small amount of glaze at a time. If you get too much glaze on your brush, dab it off on a rag or paper towel before you begin work on your piece. Lightly brush your piece in sections using full strokes. The glaze should not be so thick as to conceal the paint. Applying the glaze a bit heavier in some spots and lighter in others will help you achieve an authentic look. Tip: If an area is too thick simply remove the excess by dabbing with a clean rag or cheese cloth the carefully brush the area.
- Apply Clear Coat: Once piece has dried, apply a clear coat to protect your work. An oil base varnish can be applied over oil base paint and glaze. For water based paint and glaze use water based clear finish. Using a low seen will look better than a high gloss.
I advise always testing your faux patina technique on a scrap piece of wood before tackling an entire piece of furniture.
Tools and materials for creating a faux patina.
- Sander or stripping product if applicable
- Paint rollers, 2” and 3” paint brush (paint sprayer if applicable)
- Primer
- Medium and fine grade sandpaper
- Paint (satin finish, in your choice of color)
- Glaze (tinted brown or gray)
- Clear wood finish
- Clean rags
- Newspaper of other material to cover workspace
If you have a piece of furniture that needs a little TLC, applying a faux patina might just be the pick-me-up it needs. Paint color and glaze choice combinations are almost endless, leaving you much creative freedom. Applying faux patina to furniture isn’t difficult, and it’s a skill you’ll improve on in time. Tackle a small item before you try applying an aged patina to that large country table though. Take your time, and experiment. Soon, you’ll feel confident enough to patina furniture of any shape and size.