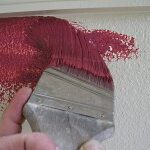
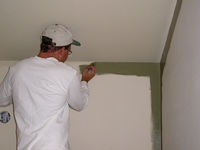
Cutting in a corner is a technique used by professional painters to achieve a professional appearance along the ceiling edge of a wall and in the corners of the room.
It is a simple technique that requires a trim brush. Trim brushes can be recognized by the beveled bristles at the tip of the brush. The shape is similar to a chisel. This type of brush makes it easier to paint right up to the line where two different colors meet.
Cutting in a Corner Against the Ceiling

- Apply blue painter’s tape or Frog Tape® on the ceiling to prevent any paint from getting onto the ceiling. Using tape is optional. Pros don’t need to use tape as we have a steady hand. Consider the tape to be a guide only.
- To make it easier to “cut in” the corner, dip the paint brush a third of the bristle length into the paint. Never dip the paint brush more than a third into the paint because this makes it difficult to control where the paint goes.
- Drag the brush against the inner lip of the paint can to remove most of the excess paint.
- Press the tip of paintbrush to the wall slightly below the junction of wall (about 1/16 inch) and ceiling. Gently rock the paintbrush slightly upward so paint reaches the junction, then draw the brush down about three or four inches. Move the brush over and repeat.
- When the brush no longer has enough paint in it to cover the wall, make one stroke that flows parallel to the ceiling. This will smooth the separate strokes.
- Continue working your way around the ceiling in this way until the entire wall has a band 3 – 4 inches wide painted on it.
- Remove painter’s tape if the results after the first coat are acceptable. If not, wait the time recommended by the paint manufacturer before applying a second coat. (Meanwhile, you can apply the first coat of paint to the rest of the wall once you have cut in the corners where the walls meet.)
Cutting a Corner Where Two Walls Meet
If the two paint colors are the same, you won’t have to apply painter tape. The process is the same as for cutting in a corner against the ceiling, only you will start with strokes that move out from the corner first, then smooth the paint in a long stroke that flows down the wall.
Additional Tips That Make It Easier to “Cut In” a Corner

- For textured walls and ceilings apply a small bead of caulk to the corner and smooth out with your finger. Allow to dry completely. Attach you tape to the caulking. This will you deal with textures like knockdown and orange peel.
- Keep the brush about 1/16 inch away from the corner. This will make it easier to not get unwanted paint on the opposite wall (or ceiling).
- Don’t try to work with too much paint. It is far easier to work with a brush that is “too dry” than one that has too much paint on it. Dip the paint brush more often rather than trying to get the job done too quickly.
- Only try to work 4 – 5 inches at a time. You want the paint to still be wet when you do the smoothing stroke.
- Don’t rush. Try not to depend on the masking tape to prevent paint getting on the opposite surface. You’ll be much happier with the results.

