Drywall texture can disguise a multitude of sins: poor finishing technique, uneven plaster, and even warped studs can be made less noticeable with the application of a nice texture. Apply orange peel drywall texture if you want a subtle finish that goes well with most types of paint.
Orange peel texture looks surprisingly like its namesake: bumpy but not rough. It has a somewhat organic look that goes well with most decors.
You’ll Need
- Primer and painting supplies
- Drywall compound (either powder or premix)
- Clean five gallon bucket for mixing
- Water
- Drill with ribbon mixer attachment
- Wire mesh
- and air compressor
- Safety goggles
Prime First
It’s important to prime before texturing. Primer provides “tooth” for the texture to adhere to and also helps the drywall compound dry more evenly for a consistent finish. Using tinted primer will keep you from missing spots with the texture.
Mix the Drywall Compound
Combine the drywall compound with water in the five gallon bucket. You’ll probably need about five parts powder to 30 parts water; if using premix, just add water, one cup at a time, until the proper consistency is achieved. The compound should look and feel like thin pancake batter. A drill and ribbon mixer attachment will make mixing easier.
Keep track of the proportions you use, and write it down. This will help you achieve the same consistency if you run out of texture, or if you need to re-texture a patch in the future.
Many people like to cover the bucket and let the mixture sit overnight. This helps create a more uniform texture and allows lumps to dissolve. Stir again before using, and pour the mud through a mesh screen to eliminate any remaining lumps and other impurities.
Prepare the Gun
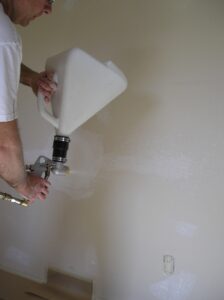
Load the hopper and attach the gun to the air compressor. If you’ve purchased the gun, you’ll want to carefully read the user manual before beginning. If it’s rented, the store associate should be able to instruct you on the proper use of the spray gun.
Experiment with the air pressure and aperture width. Pressure of 25 to 45 PSI is usually perfect. Lower pressure won’t be sufficient to expel the compound from the gun; higher pressure will make it harder to control the application.
A smaller aperture will create a finer texture, whereas a larger opening will cause bigger blobs to form.
Do a Test Spray
Practice your technique on a scrap of wood, drywall, or cardboard. Once you’ve achieved a look you like, make a note of the aperture width and air pressure in case you need to recreate the effect later.
Apply the Texture to the Wall
Spray orange peel texture onto the prepared surface in a wide, sweeping motion. It’s best to use a light touch; you can always go over an area again if you need more depth, but removing excess texture is a hassle. Depress the trigger about halfway. Keep the gun moving constantly; pauses will create heavy deposits. Some people like to apply the mixture in horizontal sweeps, others prefer vertical passes, and still others like to move the gun in a random pattern. Choose the technique that works best for you; just keep in mind that the goal is to apply the texture as uniformly as possible.
Patches
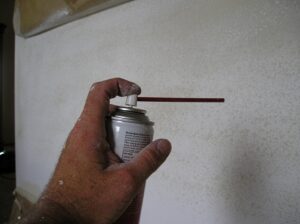
To re-texture patched areas, prime the repair and surrounding area. It is difficult, if not impossible, to create an exact match using spray texture. If you wrote down the texture formula, air pressure, and aperture width it will be easier. Otherwise, you will have to experiment. Feathering the repair (applying texture to the surrounding area in lighter and lighter sweeps) will help it blend better. For small areas or out of the way areas, using an will provide acceptable results with less mess.
Finishing Touches
After the orange peel drywall texture dries, apply another coat of primer and a coat or two of paint. You’re done!

