Many acoustic ceiling texture repairs are not very difficult, although a bit messy. A common term for this type of texture is “popcorn texture.” These same techniques apply to to this type of texture no matter what it is called. The most common causes of damage are water leaks, cracked drywall and loose or bubbled drywall tape.
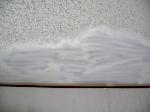
Water damage will cause the texture to become loose from the drywall and possibly bubble or flake. Scraping with a 6-inch drywall knife will easily remove the acoustic texture from the damaged area.
If the acoustic ceiling has never been painted, apply water with a spray bottle to assist with the removal of the texture. The water will soften the texture making removal easier. You will need a cleared area at least one foot around the damaged spot for any patching.
The acoustic texture can appear to be loose across a large area of the ceiling. If this is noticed while scraping you have an option, instead of scraping the entire ceiling and creating more work.
 After removing the texture around the damaged area the the repair area or the entire acoustic ceiling can be primed with a thinned stain blocking primer. An acrylic primer will work great bur might not seal water stains. In this case an oil base or shellac is better. Thinning the primer 25% will help it penetrate through the texture and make a bond with the underlying drywall. Two coats applied with an airless sprayer is the best method.
Any water stains or discolored areas will need to be primed with a stain blocking primer before any patching can take place.
 Once the acoustic ceiling is scraped and primed you need to make sure the drywall is fully secured to the framing lumber. Push on the ceiling with your hands and check for any movement. There should be none. If any movement is detected apply drywall screws to the framing on either side of the damaged area.
Apply pressure with your hand while installing the screws, this will lift the drywall and allow it to be properly secured. All patching can now take place. As with repairing walls, tape all cracks and any major repairs. Apply joint compound in the same manner as when patching walls.
The final patching doesn’t have to be perfect. “Popcorn” texture can hide a lot of imperfection.
Applying Acoustic Ceiling Texture
This texture is available in three grades of roughness; course, medium and fine. You can change the appearance of the three grades by varying the thickness of the application. To achieve a heavy texture two coats may be needed.
Applying this texture is a very messy affair. All surfaces must be protected from over-spray. Spend the time to properly mask and cover adjacent surfaces now and save a lot of time cleaning later.
Using an aerosol can of acoustic texture for small areas.
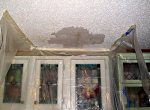
 This is a very convenient and economical way to fix a small area, up to 2ft × 2ft. In order to protect adjacent surfaces pin-up or tape lightweight plastic around the repair. Keep the plastic 2 or more feet away from the repaired area. This will look like a tent hanging from the ceiling to the floor. Also cover the floor under the plastic.
Shake the can continuously for two minutes. To apply the texture, hold the can 14—16 inches from the ceiling. The aerosol can discharges very rapidly, in just 1—2 seconds. You need to move very quickly.
A second coat can be applied after the first coat has dried completely. The manufacture states the can will cover up to a 2ft × 2ft area, but I recommend 2 cans. The first aerosol can is for the actual patch and the second is used to blend the new texture with the existing texture.
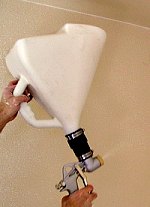
Using a hopper and air compressor for large areas.
 This is the best method for applying acoustic ceiling texture. It offers excellent control and is easier to use when compared to aerosol cans. Plus, the hopper is inexpensive and can be used to apply different wall textures.
The hopper works with an air compressor. There are electric fan based models that work well.
The texture used with a hopper is in a dry form and mixed with water, follow the manufactures mixing instructions.
Spray the texture by holding the hopper 2ft—3ft away from the ceiling. Move the hopper from side to side, applying a thin even layer over the patch. Apply another layer in the opposite direction.
Blend by spraying a thin layer over the existing acoustic ceiling.

