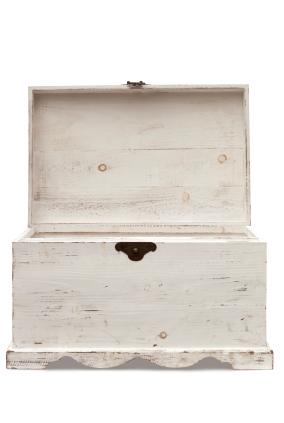
The Process of Distressing Furniture Adds an Aged Look
Distressing a piece of relatively new furniture is a great way to make it look older than it really is. Old furniture has naturally occurring distress characteristics. Over time, furniture gets nicked, bumped, worn down and damaged. All of these factors can contribute to an “old” look.
Instead of waiting 100 years for a piece of furniture to become naturally distressed, it is possible to create a look of age by applying specific techniques. There are many methods that can be used for distressing furniture and each creates a different appearance. If desired, more than one technique can be utilized.
Keep in mind that the process of distressing furniture is not as simple as allowing a bunch of kids to randomly bang on the furniture with a hammer! While not difficult, distressing involves the use of some tools (one of which actually is a hammer), different types of paint, and a few other miscellaneous materials.
Practice!
Before taking a hammer and a drill to a piece of beloved furniture to make the piece look distressed, make sure to practice your techniques. The two best places to find inexpensive wood furniture that can be used for practicing purposes are thrift stores and garage sales. Make sure to purchase furniture that you actually like and think that you may be able to use. You may find that you are really good at the distressing process during your practice phase, and you may end up creating a distressed piece of furniture that you will want to keep long-term.
The Level of Difficulty for Distressing Furniture is “EASY”
The process of distressing painted furniture is easy. The first step is removing the old finish, sanding the piece, and making sure it is clean and dry. The next step is applying two coats of primer to the wood. Finally, add a layer of paint to the furniture. When dry, add as second and third layer of paint. You may choose to add different colored layers which will all show after distressing techniques are employed.
Following is a list of easy distressing techniques. However, there are many others. Because furniture undergoes unique environments over time, there is no “right” or “wrong” way to distress furniture.
Distressing Techniques:
Sandpaper: Use sandpaper to remove paint on the edges of the furniture. This simulates years of wear. Sand lightly so that underlying layers of paint show through – but not all the way down to the bare wood.
Worms and Insects: It is possible to add the appearance of worm and insect holes in the wood. Use a sharp object such as an ice pick to dig small holes in the wood.
Hammers and Screwdrivers: Use these and other tools that you might find in a tool shed to add dents and dings to the furniture. Do not bang on the furniture too hard! Use a light amount of pressure to add randomly placed depressions.
Kitchen Utensils: Just like the tools from the shed, look through your kitchen drawers to see if there are any utensils that you can use to add small impressions to the furniture.
Wood Stain: After dents and dings are added, use a paintbrush to apply stain to the dented areas and holes that were added to the furniture. The dark color that is applied by the stain will cause an additional layer of “age” to the wood.
After distressing the furniture to your liking, apply a coat of shellac or polyurethane to finish and seal the piece. Distressing furniture is a great way to add character and age to any piece of wood furniture. The process is fun and it is very hard to make permanent mistakes. In fact, if you are not pleased with your results you can simply re-apply a layer of paint and try again!


