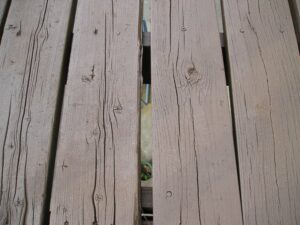
To maintain the safety and beauty of your deck, you should inspect it carefully once a year and perform any necessary repairs. Rotten wood, loose joints, and missing slats are ugly, but they can also cause serious injuries. Here are the basic areas you need to check each year.
Clear Any Debris
The first step to a thorough inspection is to remove any debris that has accumulated beneath and around your deck. If this is a storage area for your family, sort through and discard damaged or unwanted items. Pull weeds and discard any trash that may have blown underneath the structure. You’ll be amazed at what you will uncover.
Check Deck Where It Attaches to the House
Check along the exterior wall of the house and seal any gaps, cracks, or holes that might allow pests, drafts, or moisture into your home. Damage like this often goes unnoticed when it’s concealed by decking.
 Look for Broken or Rotten Wood
Carefully inspect the frame and floor joists. These are the most common places for rot to occur. You may need to remove the floorboards to do this, especially if the crawl space below your deck is limited.
Remove and replace any wood in your deck that is rotten or broken. If you’re not sure, replace it! It will only get worse with time.
If you do remove floorboards during inspection, consider re-installing them upside-down. This turns a fresh, unblemished surface to the top. Just make sure you seal the faded surface first, to prevent water damage! In fact, you can save time, by staining and/or sealing the boards on both sides before laying them back down.
Eliminate Areas That Collect Water
Covering the edges of the floor joists with strips of rubberized roofing membrane will prevent moisture from collecting in the joint and causing rot. A two inch or wider strip will provide sufficient coverage for a 1-1/2″ joist. Once this is done, replace the floorboards.
Reinforce Joints
Reinforce joints with glue and hammer in loose nails. Use a nail set to force the nail head below the surface of the wood. This will make it more secure. Be careful to avoid denting the wood. The mark will be very visible once stained.
A better idea is to replace loose nails with wood deck screws. Be sure you use deck screws as they are formulated to not stain the wood.
Even though screws are more expensive, they are a better long-term choice. Nails always loosen, given enough time, whereas screws rarely fail.
Replace Loose Nails with Deck Screws
Once a nail has loosened, it will never hold the board down again. The nail just pops back up. Rather than replacing all the nails, just deal with those that have popped.
Slide the claw end of the hammer under the loose nail. Now, place a thin piece of wood underneath the head of the hammer. The wood should extend under the entire head of the hammer to within an inch of the nail. As you pull the nail out, the piece of would will shield the deck from ugly dents.
Choose deck screws an inch longer than the nails they are replacing. This ensures that the screw bites into fresh wood for a tighter hold. The sides of the nail hole can be soft—Countersink the screw slightly; that is, drive it in until the surface is slightly below the surface of the wood. At this point, you can leave it as-is (most people do) or cover the screw head with wood putty.
Once all the visible loose nails are taken care of, walk up and down each floorboard, checking for give. If the board bounces, the nail is loose at that spot. If you can work the nail up without damaging the wood, pull it and replace with a screw.
Check for Loose Rails
Try to wiggle the handrail. If it moves, inspect for missing or loose nails. Replace nails with deck screws or lag bolts. If the handrail is already secured by screws, add an additional screw or two to tighten it up.
Once you have your deck in good structural shape, you can proceed with the final touches: powerwashing, sanding, and staining or painting.
Author:
Crowder Painting offers complete interior and exterior painting services in Colorado Springs with an eye on the details. We have all the tools, experience and knowledge to do the job right. Receive a paint job that lasts; Give us a call, all estimates are free.


