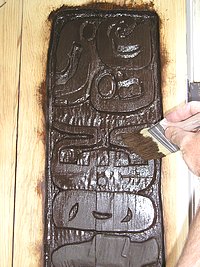
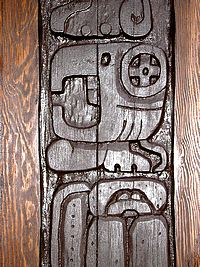
 The next step for Crowder Painting, Craig and I, was staining the wood doors. When the sanding was finished the doors looked very good and a clear finish could have been applied, but the customer requested a rich colored stain be applied.
These doors are made from Fur, a soft wood. We needed a very controllable stain which will dry quickly. A pre-stain conditioner could have been used with a wiping stain, but the color and depth requested was beyond one coat of wiping stain. It would have taken two coats and an extra day if we used a wiping stain. To save time and achieve the desired color a gel stain was chosen.
Staining the wood doors proceeded as follows,
- First we started with the carved areas. It’s always best to stain the difficult parts first.
- Now the large areas could be stained. We worked a section at a time from the top down.
Using Gel Stain on These Custom Entry Doors
 Begin with a little stain on the brush, recommend a china bristle brush, then apply it to an area with light brush strokes. Apply the stain with the wood grain.
Move the excess stain around to raw areas until the desired color depth is achieved. This is the look you will need to achieve each time an area is stained.
Now repeat the same procedure 2-3 inches away. Move the stain toward the previously stained area. Any excess stain can be removed with a dry brush and applied to another area.
If you have applied too much stain remove it with a rag or wipe the bristles of the brush on the rag and then proceed to remove more stain.
Each time an area is stained it needs to be blended into a previously stained area. Use the dry brushing method with light brush strokes. Never remove excess stain with solvent as this will produce a blotched area that will be difficult to cover and blend.
It will take a little practice, but the dry brushing method needs to be learned. Try practicing on a piece of scrap lumber before beginning your project.
Now that staining the wood doors is done, allow 12-24 hours of drying time before proceeding with the application of a clear wood finish.
Part 1 – Refinishing a Custom Wood Door
Part 2 – Refinishing a Wood Door: Sanding the Wood Doors
Part 4: Applying Wood Varnish to the Custom Entry Doors


